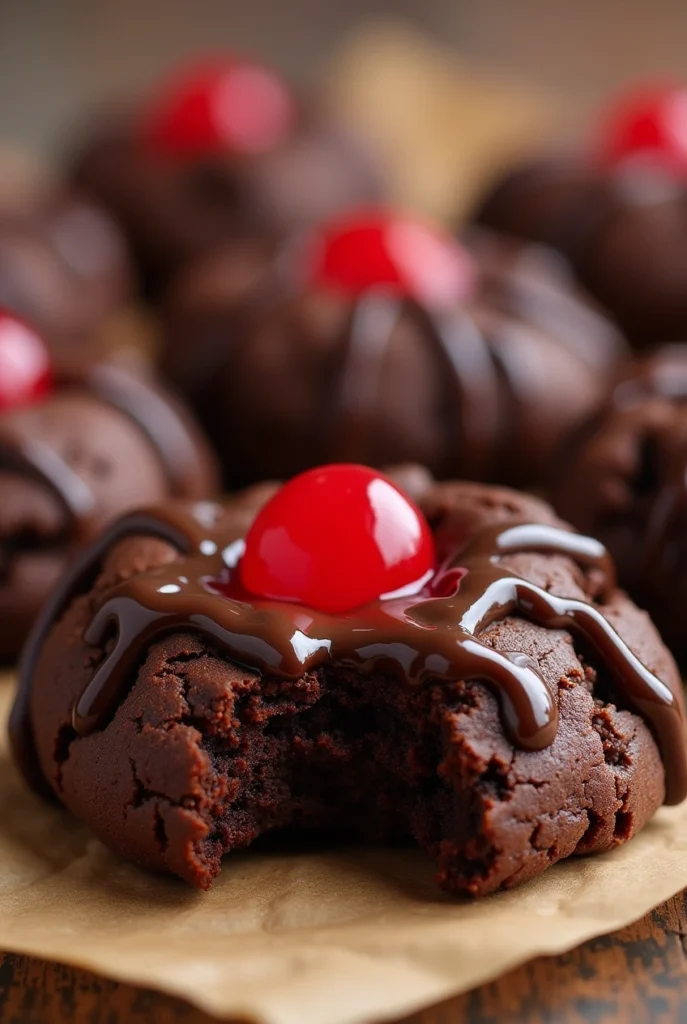
Chocolate Cherry Cookies How to Make the Best Batch in 5 Simple Steps
Have You Ever Wondered What Makes a Cookie Truly Irresistible?
Imagine biting into a warm, soft cookie that melts in your mouth with every chew. The rich chocolate blends perfectly with bursts of juicy cherries, creating a flavor explosion you can’t resist. But have you ever wondered what makes some cookies stand out while others fall flat? Is it the ingredients, technique, or maybe even a little magic? In this guide, we’ll uncover the secrets to making the best Chocolate Cherry Cookies in just five simple steps. Ready to bake something amazing? Let’s dive in!
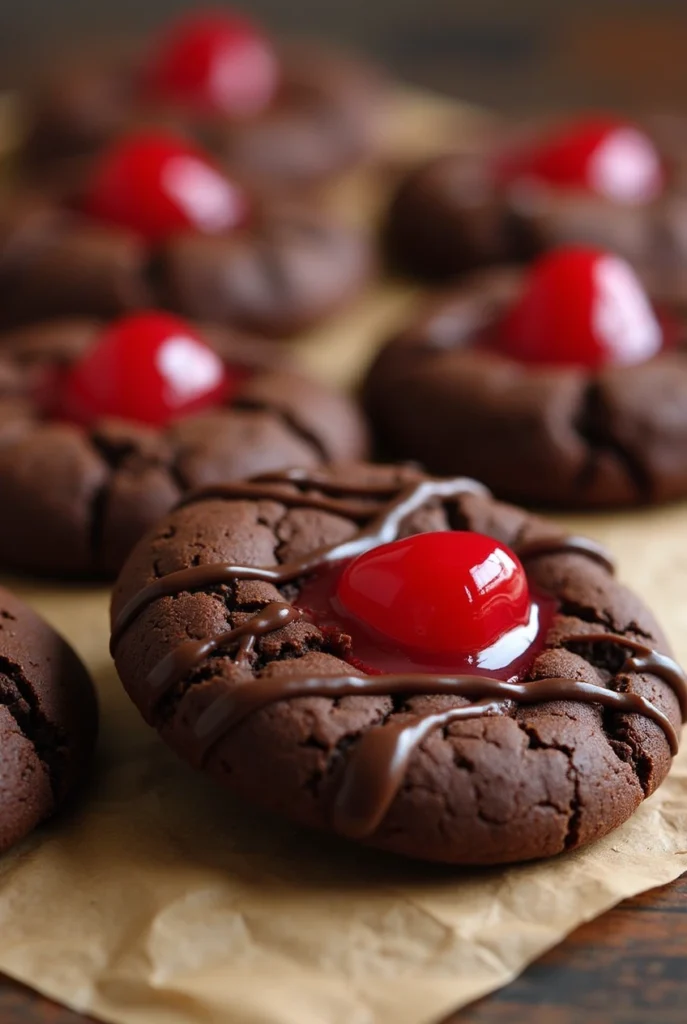
Table of Contents
Overview: Why This Recipe Stands Out
Making Chocolate Cherry Cookies doesn’t have to be complicated. This recipe is special because it combines two crowd-pleasing flavors—rich chocolate and sweet-tart cherries—into one delicious treat. Plus, it’s quick (ready in under an hour) and easy enough for beginners. Here’s what you need to know:
- Time Required: About 30 minutes prep + 10–12 minutes baking.
- Difficulty Level: Beginner-friendly.
- Health Benefits: These cookies are made with wholesome ingredients like dark chocolate and dried cherries, which provide antioxidants and fiber.
This recipe isn’t just about taste—it’s about bringing joy to your kitchen and sharing love through food. So let’s get started!
SAVE THIS EASY CHOCOLATE CHERRY COOKIES RECIPE TO YOUR FAVORITE PINTEREST BOARD!
Essential Ingredients: The Building Blocks of Perfection
Great cookies start with great ingredients. Here’s what you’ll need for these Chocolate Cherry Cookies , along with why each plays a crucial role:
Key Ingredients:
- All-Purpose Flour : Provides structure and helps the cookies hold their shape.
- Baking Soda : Acts as a leavening agent to make the cookies light and fluffy.
- Salt : Enhances all the other flavors.
- Unsalted Butter : Adds richness and moisture. Use room temperature butter for easier mixing.
- Granulated Sugar & Brown Sugar : Creates sweetness and helps keep the cookies moist.
- Eggs : Binds everything together and adds moisture.
- Vanilla Extract : Brings depth and warmth to the flavor profile.
- Dark Chocolate Chips : Rich and indulgent, they’re the star of the show.
- Dried Cherries : Sweet and tangy, they add bursts of fruity goodness.
Substitutions and Variations:
- Swap all-purpose flour with whole wheat flour for a healthier option.
- Use semi-sweet chocolate chips if you prefer less intense chocolate.
- Replace dried cherries with cranberries or chopped candied ginger for a twist.
Pro tip: Always measure ingredients accurately using measuring cups or a kitchen scale for consistent results.
Step-by-Step Instructions: Five Easy Steps to Success
Now that you’ve gathered your ingredients, let’s walk through the process step by step. Each stage is designed to ensure your Chocolate Cherry Cookies turn out perfect every time.
Step 1: Preheat Your Oven and Prep the Pan
Preheat your oven to 375°F (190°C). Line a baking sheet with parchment paper or a silicone mat to prevent sticking. This small step saves cleanup time later!
Step 2: Cream the Butter and Sugars
In a large mixing bowl, beat the softened unsalted butter, granulated sugar, and brown sugar until creamy and smooth. This step incorporates air into the mixture, giving your cookies a lighter texture.
Tip: If your butter is too cold, microwave it briefly in 5-second intervals until soft but not melted.
Step 3: Add Wet Ingredients
Crack one egg into the butter mixture and beat well. Then stir in the vanilla extract. Mix until fully combined. The eggs and vanilla work together to enhance the overall flavor and bind the dough.
Step 4: Combine Dry Ingredients
In a separate bowl, whisk together the flour, baking soda, and salt. Gradually add this dry mixture to the wet ingredients, stirring gently until no streaks remain. Be careful not to overmix, as this can make the cookies tough.
Step 5: Fold in the Chocolate and Cherries
Gently fold in the dark chocolate chips and dried cherries. Stir until evenly distributed throughout the dough. Don’t skip this part—it’s where the magic happens!
Assembly: Bringing It All Together
Once your dough is ready, it’s time to shape and bake those cookies! Follow these tips for picture-perfect results:
- Scoop and Shape : Use a tablespoon or cookie scoop to portion out equal-sized balls of dough. Place them about 2 inches apart on the prepared baking sheet.
- Flatten Slightly : Gently press down on each ball to flatten it slightly. This ensures even baking.
- Bake Until Golden : Bake for 10–12 minutes, or until the edges are golden brown but the centers still look slightly soft.
For presentation ideas, sprinkle coarse sea salt on top of the unbaked cookies for a salty-sweet contrast. Or drizzle melted chocolate over cooled cookies for extra flair.
Storage and Make-Ahead Tips: Keep Them Fresh Longer
No matter how good your Chocolate Cherry Cookies are, there will always be leftovers (or at least we hope so!). Here’s how to store them properly:
- Room Temperature : Store in an airtight container at room temperature for up to 5 days.
- Freezing : Freeze baked cookies in a freezer-safe bag for up to 3 months. Thaw overnight in the fridge before serving.
- Reheating : Pop cookies in the microwave for 10 seconds or toast them in a preheated oven at 350°F for 5 minutes to restore freshness.
Make-ahead tip: Prepare the dough ahead of time and freeze it in portions. Simply thaw and bake when you’re ready for fresh cookies anytime!
Recipe Variations: Get Creative in the Kitchen
Feel free to experiment with these fun twists on classic Chocolate Cherry Cookies :
- Nutty Delight : Add chopped walnuts or almonds for added crunch.
- Spiced Up : Sprinkle cinnamon or nutmeg into the dough for a warm, cozy flavor.
- White Chocolate Swap : Replace dark chocolate chips with white chocolate for a sweeter take.
- Gluten-Free Option : Use gluten-free flour blend instead of all-purpose flour.
Let your creativity shine—you might discover your new favorite variation!
Conclusion: Enjoy the Joy of Baking
Making Chocolate Cherry Cookies is more than just following a recipe—it’s about creating memories and spreading happiness. Whether you’re baking for yourself, family, or friends, these cookies are sure to bring smiles. So grab your apron, roll up your sleeves, and enjoy the process. Happy baking!
FAQs: Answers to Common Questions
Q: Can I use fresh cherries instead of dried ones?
A: While fresh cherries add moisture, they may alter the texture of the cookies. Stick with dried cherries for best results.
Q: Are these cookies healthy?
A: They contain fiber-rich dried cherries and antioxidant-packed dark chocolate, making them a guilt-free treat in moderation.
Q: How long do the cookies stay fresh?
A: Kept in an airtight container, they last up to 5 days at room temperature or several months frozen.
Q: Can I double the recipe?
A: Absolutely! Just remember to adjust cooking times accordingly.
With this guide, you’re now equipped to create irresistible Chocolate Cherry Cookies effortlessly. Go ahead and try the recipe—you won’t regret it!
Did You Try Our Recipe?
There are no reviews yet. Be the first one to write one.