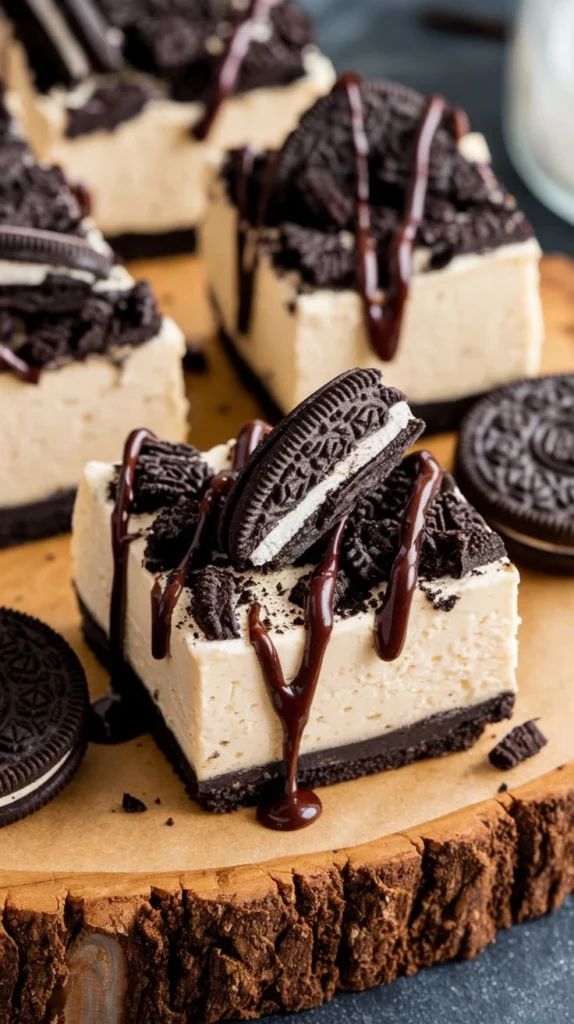
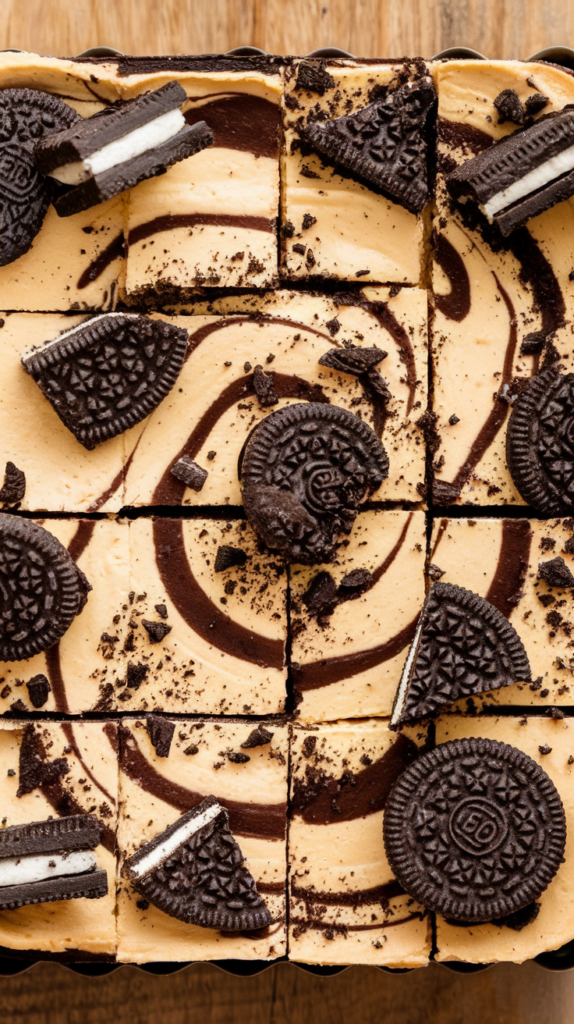
Oreo Cheesecake Bars No Bake
The Ultimate Guide to Making Oreo Cheesecake Bars No Bake
Have You Ever Wondered How Simple Ingredients Could Create a Dessert That Feels Like a Culinary Masterpiece?
Imagine whipping up a dessert that tastes as if it came straight from your favorite bakery, but without the hassle of turning on your oven. Does such magic exist? Yes, it does! Today, we’re diving into the world of no-bake desserts with our star creation: Oreo Cheesecake Bars. These bars are creamy, irresistible, and surprisingly easy to make. Ready to discover how simple ingredients transform into pure decadence?
Why This Recipe Stands Out
When life gets busy, who has time for complicated recipes? Our Oreo Cheesecake Bars are perfect because they require zero baking, minimal prep time, and just a handful of ingredients you likely already have at home. Plus, they’re ready in under an hour, making them ideal for last-minute gatherings or spontaneous cravings. Whether you’re a beginner baker or a seasoned pro, this recipe is straightforward enough for anyone to master.
Time Requirement: Approximately 30 minutes of active preparation, plus chilling time.
Difficulty Level: Beginner-friendly—no special skills required!
Table of Contents
Ingredients You’ll Need
For these mouthwatering Oreo Cheesecake Bars, gather the following items:
- Crust:
- 2 cups crushed Oreo cookies (about 24 cookies)
- ⅓ cup melted butter
- Filling:
- 16 oz cream cheese, softened
- 1 cup powdered sugar
- 1 teaspoon vanilla extract
- 1½ cups heavy whipping cream, whipped
Optional toppings:
- Additional crushed Oreos
- Chocolate drizzle
- Fresh fruit slices
These basic pantry staples come together to create a rich, creamy treat that will leave everyone asking for seconds.
Step-by-Step Instructions
Let’s break down the process so you can confidently tackle this delicious recipe.
- Prepare the Crust
- Begin by crushing your Oreo cookies into fine crumbs. You can use a food processor for speed or place them in a ziplock bag and crush them with a rolling pin.
- In a mixing bowl, combine the crushed Oreos with melted butter until the mixture resembles wet sand.
- Press this mixture firmly into the bottom of an 8×8-inch baking dish lined with parchment paper. Make sure the crust is evenly distributed and compacted to prevent crumbling later on.
- Make the Filling
- Using a stand mixer or hand mixer, beat the softened cream cheese until smooth and creamy. Gradually add the powdered sugar and vanilla extract, mixing well after each addition.
- In a separate bowl, whip the heavy cream until stiff peaks form. Gently fold the whipped cream into the cream cheese mixture until fully incorporated. Be careful not to overmix, as this could deflate the airiness of the filling.
- Assemble the Bars
- Spread the cream cheese mixture evenly over the prepared crust. Use a spatula to smooth out the top for a polished look.
- Cover the dish with plastic wrap and refrigerate for at least 4 hours—or overnight—for the best results. Chilling allows the flavors to meld and the texture to set properly.
Assembly Tips and Presentation Ideas
Once your Oreo Cheesecake Bars have chilled, it’s time to slice and serve! Here are some tips for assembly and presentation:
- Cutting Perfect Slices: To ensure clean cuts, dip your knife in hot water and wipe it dry between slices. This prevents sticking and gives you neat, professional-looking pieces.
- Topping Suggestions: Consider adding extra flair with crushed Oreos sprinkled on top, a drizzle of chocolate sauce, or even fresh berries for a pop of color.
- Presentation Matters: Arrange the bars on a decorative platter for a festive touch. For parties, consider setting up a DIY toppings bar where guests can customize their own creations.
Remember, presentation enhances the dining experience, so don’t hesitate to get creative!
Storage and Make-Ahead Tips
One of the greatest advantages of these Oreo Cheesecake Bars is their longevity when stored correctly. Follow these guidelines to keep your dessert fresh:
- Storage: Keep the bars tightly wrapped in plastic or stored in an airtight container in the refrigerator. They should stay fresh for up to 5 days.
- Freezing Option: If you want to extend their shelf life, freeze the bars for up to 2 months. Simply thaw them in the fridge overnight before serving.
- Reheating Isn’t Necessary: Since this is a no-bake recipe, there’s no need to reheat. Serve chilled for optimal flavor and texture.
By planning ahead, you can enjoy these treats anytime without worrying about last-minute preparation.
Recipe Variations
While classic Oreo Cheesecake Bars are undeniably delightful, why stop there? Here are some exciting variations to try:
- Flavored Oreos: Swap regular Oreos with seasonal or specialty flavors like peanut butter, strawberry, or mint chocolate.
- Layered Delights: Add a layer of pudding or yogurt between the crust and filling for added depth.
- Chocolate Twist: Drizzle melted chocolate over the finished bars or incorporate cocoa powder into the crust for a richer taste.
- Nutty Addition: Mix chopped nuts like almonds or pecans into the crust for extra crunch.
Experimenting with different combinations keeps things interesting and caters to diverse preferences.
Conclusion
There you have it—a foolproof guide to creating delectable Oreo Cheesecake Bars without ever turning on your oven. With its quick prep time, budget-friendly ingredients, and endless customization options, this recipe is a keeper. So go ahead, roll up your sleeves, and let your creativity shine. Who knows? You might just invent your own signature twist on this timeless favorite!
FAQs
Q: Can I substitute the cream cheese with something else?
A: While cream cheese provides the perfect base for richness and structure, you can experiment with alternatives like Greek yogurt or mascarpone cheese for lighter versions.
Q: Are Oreo Cheesecake Bars healthy?
A: Though indulgent, these bars offer calcium from cream cheese and a small amount of fiber from the cookie crust. Enjoy them in moderation as part of a balanced diet.
Q: Can I make this recipe dairy-free?
A: Absolutely! Use almond milk-based cream cheese and coconut whipped cream for a dairy-free alternative. Just be sure to check that your Oreos are also dairy-free.
Q: How long do the bars last in the fridge?
A: Properly stored, the bars remain fresh for up to 5 days in the refrigerator. For longer storage, freeze them for up to 2 months.
Now that you’ve got all the tools and tips, what are you waiting for? Dive into the world of Oreo Cheesecake Bars and start creating unforgettable memories—one bite at a time!
Author’s Top Recipe Picks
Chocolate Covered Strawberry Brownies Easy
Crockpot steak bites easy family recipe
Carrot Cake Roll Recipe
Heaven on Earth Cake
Did You Try Our Recipe?
There are no reviews yet. Be the first one to write one.